Photographic techniques.
|
Aperture and shutter speed are one of the most important concepts in photography and they can do a lot to change the look of your photo.
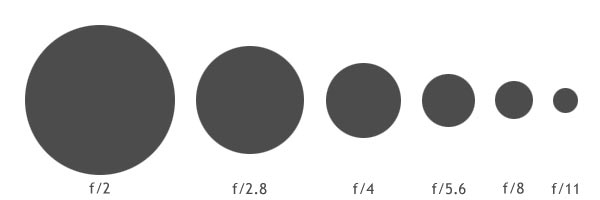
The aperture is the size of the lens opening. It controls the amount of light let in: a larger aperture lets in more light, while a smaller aperture lets in less light. The size of the opening is the f/number . Basically, the smaller the f/number, the larger the opening . |
|
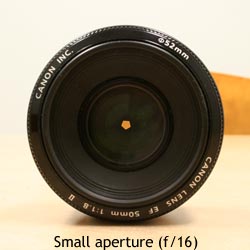
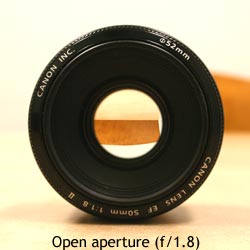
A larger aperture (lower f/number) will have your subject in focus, and everything in front of and behind it blurry. A smaller aperture will have your subject in focus and everything in front of and behind it quite focused as well. Take a look at the following diagram; the further apart the lines are, the more out of focus something is:
(Large aperture = smaller f-number, small aperture = larger f-number).
Shutter speed is how long the sensor/film in the camera is exposed to light. How long the shutter stays open depends on how much light there is. if the is shutter open too long, the picture will be too bright burnt out, and if it's not open long enough, the scene will be too dark. Therefore, you control the overall exposure (lightness and darkness) of the scene with both the aperture and shutter speed control.
What you can do with shutter speed is freeze motion with a fast shutter speed or capture movement with a slow shutter speed. Flowing water looks silky smooth at speeds slower than 1/8th of a second (with a tripod), while you can freeze water in time with fast shutter speeds.
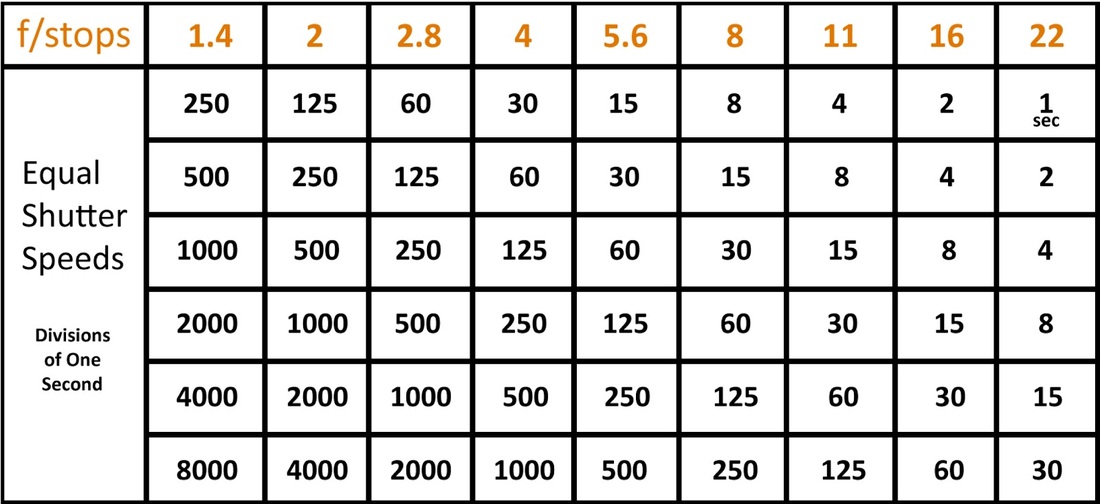
Below is a chart that helped me with f/stops.
(Large aperture = smaller f-number, small aperture = larger f-number).
Shutter speed is how long the sensor/film in the camera is exposed to light. How long the shutter stays open depends on how much light there is. if the is shutter open too long, the picture will be too bright burnt out, and if it's not open long enough, the scene will be too dark. Therefore, you control the overall exposure (lightness and darkness) of the scene with both the aperture and shutter speed control.
What you can do with shutter speed is freeze motion with a fast shutter speed or capture movement with a slow shutter speed. Flowing water looks silky smooth at speeds slower than 1/8th of a second (with a tripod), while you can freeze water in time with fast shutter speeds.
Below is a chart that helped me with f/stops.
|
|
|
Below are 2 photos I have taken exploring DPF and learning how to adjust the aperture to get the flower into focus and background blurry in one photo and the opposite on the next. this was harder than I first expected but after many failed attempts I am now happy with the result.
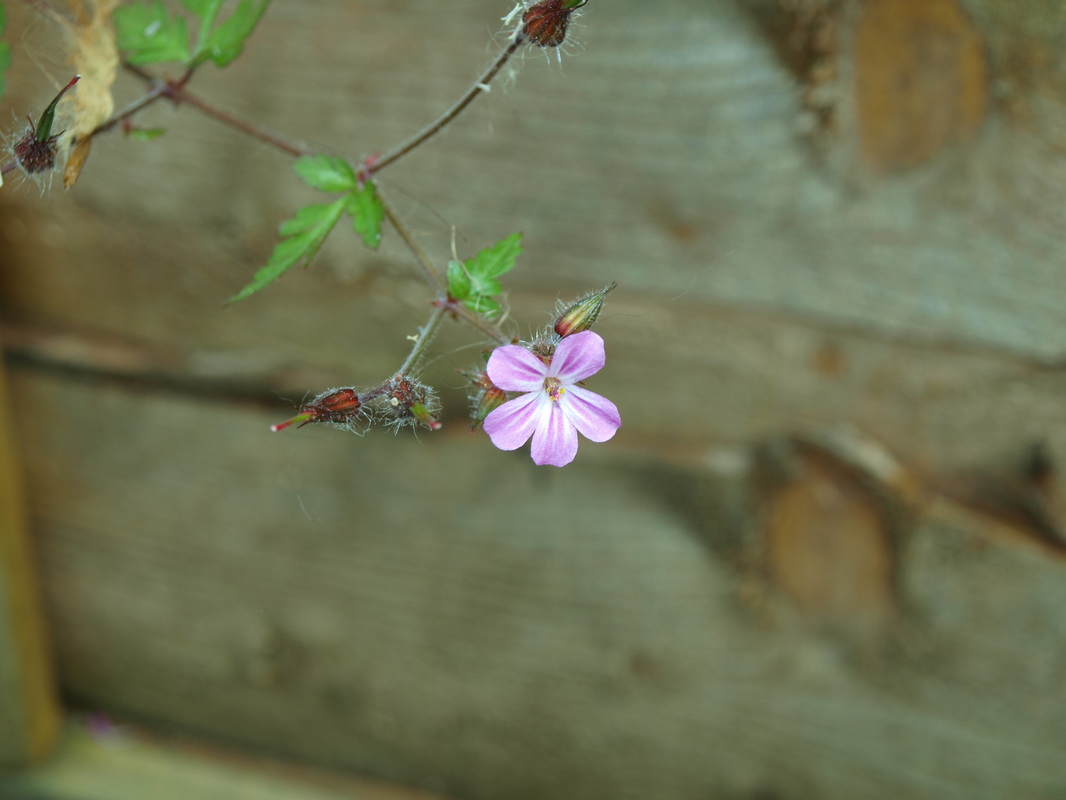
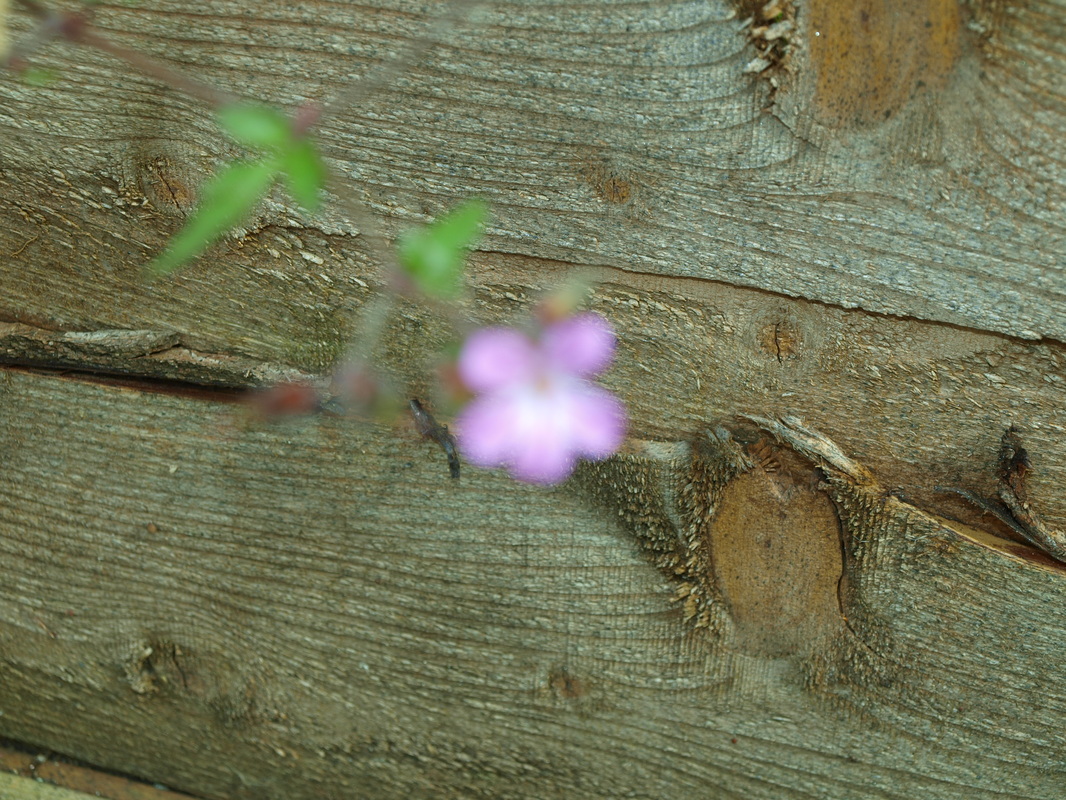
F 1.8 f 22
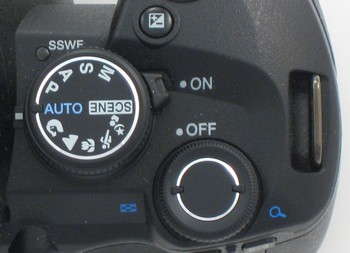
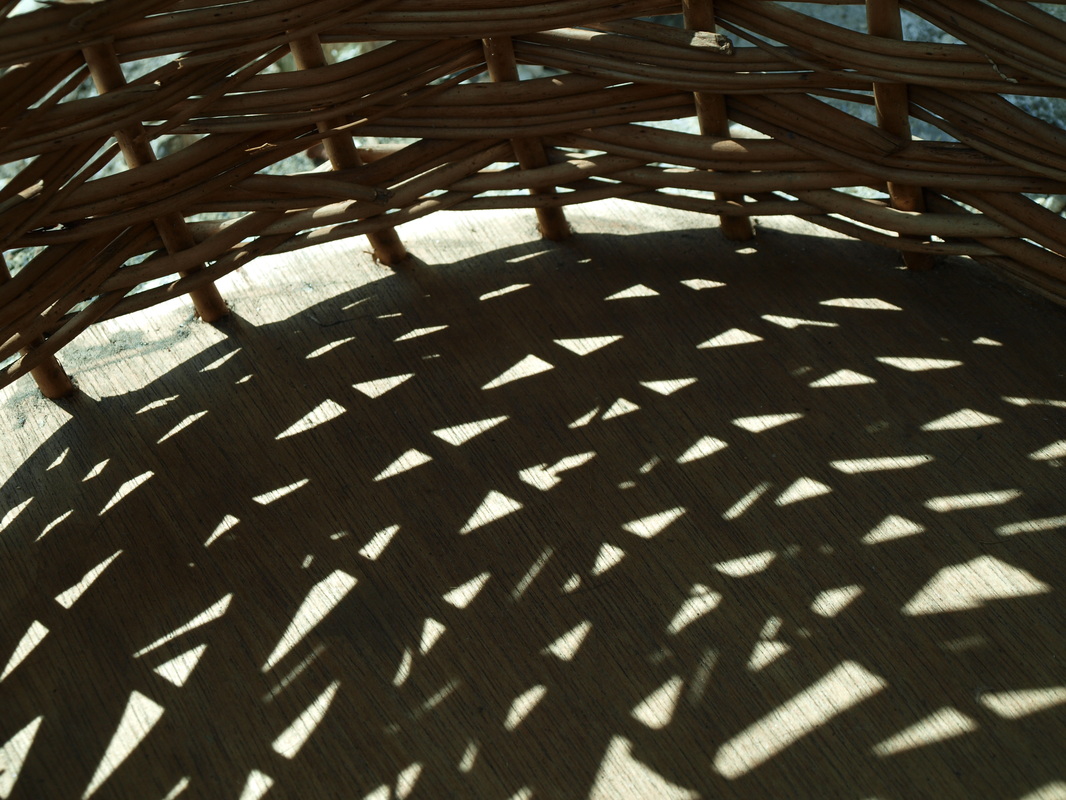
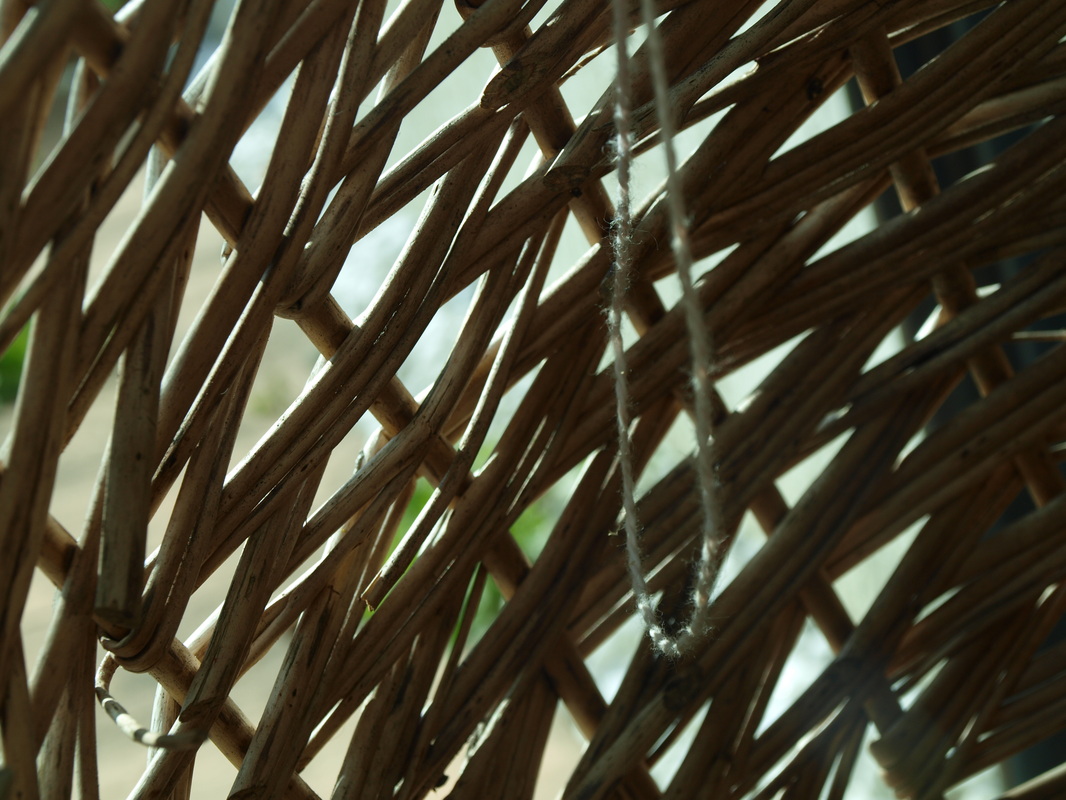
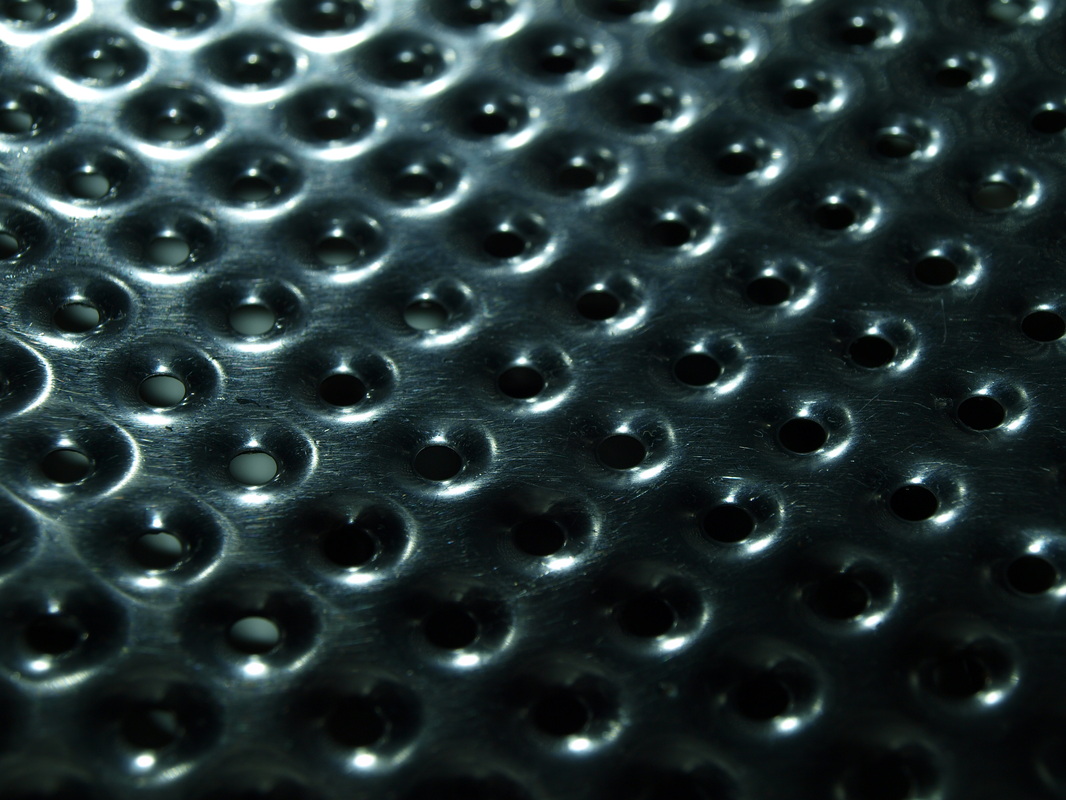
After experimenting with my camera and figuring out how to do macros ( the flower symbol on the control dial above) I become more interested with capturing photos of everyday objects close up capturing interesting patterns and shadows. thee below are some of the outcomes of this. I would love to go deeper into macro photography But the price of the lenses are way too much for me. For a cheep good lens it over £100 and as I am just starting with experimenting I don't think I will be getting one any time soon.
|
Left . No flash
F-stop f/8 Exposure time 1/160 sec. ISO speed ISO-100. Exposure bias 0 step. Max aperture 3.61328125 Right . No flash Same setting as left but with a longer exposure time 1/200 that let more light in and brightened the image. left . No flash F/8 1-40 sec ISO 125 Right . No flash f/9 1/200 sec ISO -100 I made the exposure longer as it was very dark inside the basket and i needed more light and did not want to use flash as I would have lost the shadows. Left . Flash F/8 1/80 sec. ISO-100 I had to use flash on this image as it was inside of my washing machine and I was unable to fit any lighting inside the drum as there was insufficient room. Right is same settings as left image. |
|


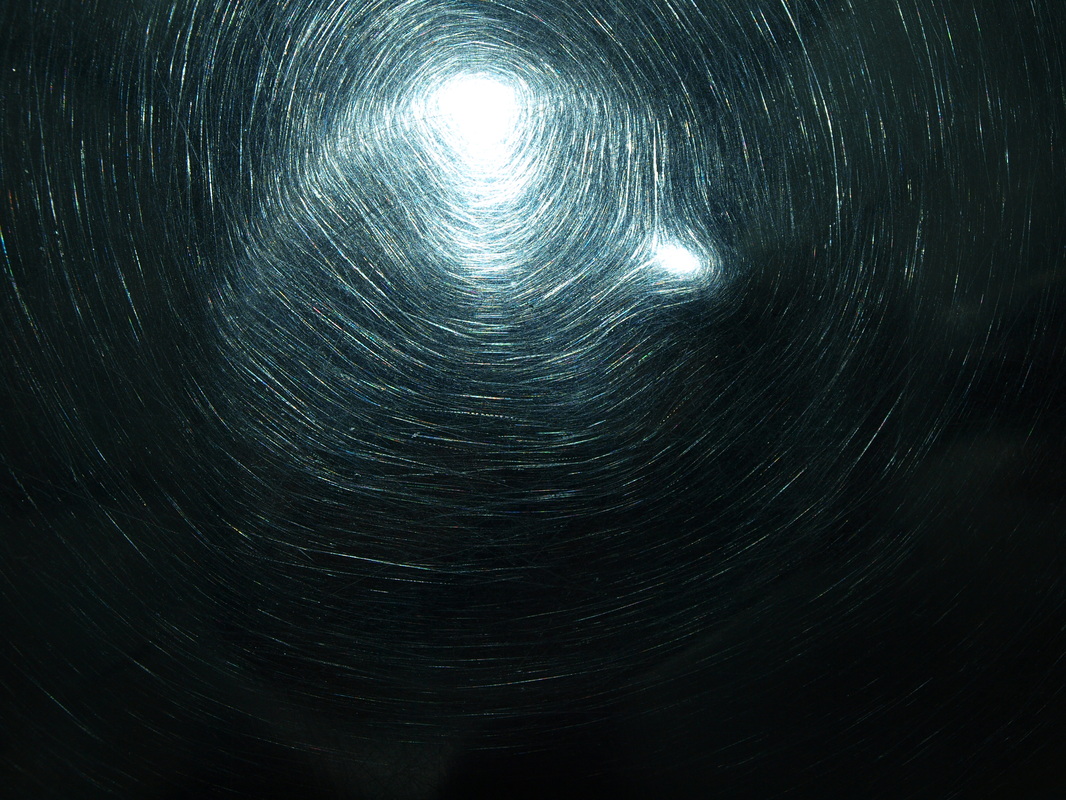
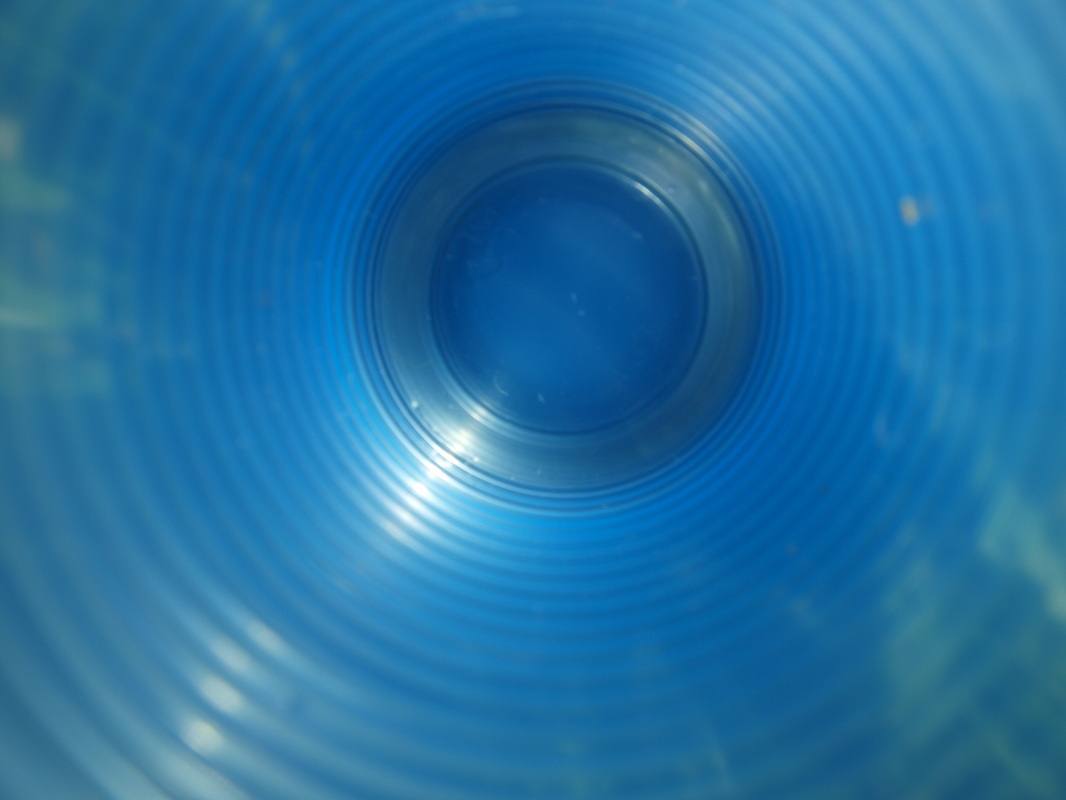
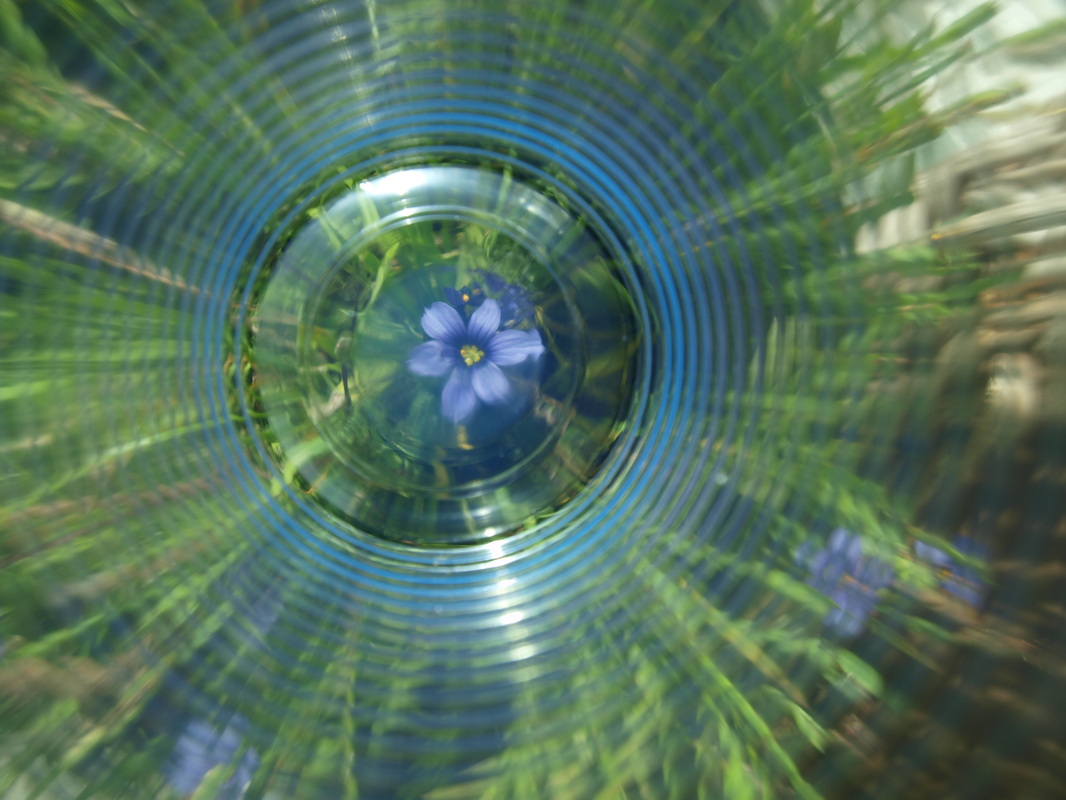
I then decided to experiment using a plastic cup over the lens to see what results this would create . I am very pleased with how this experiment went the final photo almost looks submerged in water .I will explore the idea of using the plastic cup to submerge the lens in waters and seeing what results I get.

Above my first attempt with settings F/11 ,1/1000 sec ISO-100 focal length 21mm This did not work the cup was too far away from the subject.
Below I changed the settings and focal length and moved in closer this worked well I think and I am happy with the outcome. F/8 , 1/80 sec, ISO-100 Focal length 18mm. changing the f/stop from f/11 to f/8 let in more light and i was able to see the flower.
Below I changed the settings and focal length and moved in closer this worked well I think and I am happy with the outcome. F/8 , 1/80 sec, ISO-100 Focal length 18mm. changing the f/stop from f/11 to f/8 let in more light and i was able to see the flower.
Lighting .
The broader the light source, the softer the light. The narrower the source, the harder the light. A broad light source lessens shadows, reduces contrast, suppresses texture. A narrow light source does the opposite. This is because, with a broad source, light rays hit your subject from more directions, which tends to fill in shadows and give more even illumination to the scene.
Tip: Position a portrait subject near a large, bright window that does not receive direct sunlight. It makes for a no-cost softbox— no studio equipment necessary.
The closer the light source, the softer the light. The farther the source, the harder the light. Move a light closer, and you make it bigger in relation to your subject. Move it farther away, and you make it relatively smaller, and more narrow.
Tip: When photographing people indoors move lamps closer to them or vice versa for more flattering light
Tip: Materials such as translucent plastic or white fabric can be used to diffuse a harsh light source.
Bouncing light—even into a shiny reflector that keeps light directional— adds to the distance it travels.
.
|
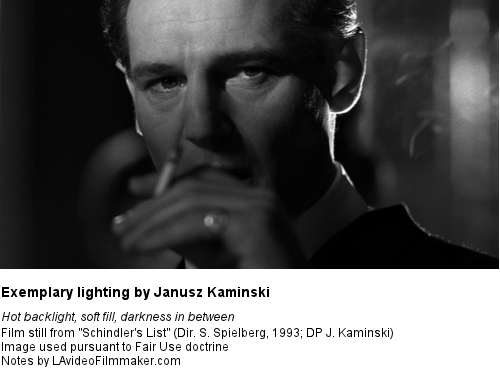
Soft front light / hot backlight
A popular technique in film lighting is to use a soft (diffuse) light source from the front and a stronger, more directional light from the back, so that your subject has a hot edge. The soft frontal light is known as the fill light; the strong light at the back is known as the backlight. You can arrange the lights in such a way as to leave darkness between the area illuminated by the backlight and the area illuminated by the fill light, depending on how moody you want the shot to be. The film still shown above is from “Schindler’s List” and is a good example of this technique. |
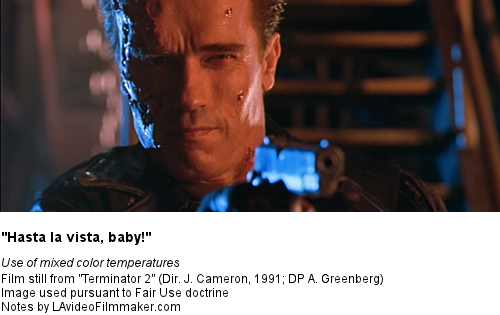
Mixing color temperatures
Using lights of different color temperatures can be used to great effect. This means using lights of different color in the same shot. Used by James Cameron in the steel mill scene of “Terminator 2″, in which he used blue and orange light (motivated by moonlight and molten steel ). The only problem with this is that you must determine the relationship between the two different colors before filming, because it is not really possible, for example, to make the blue bluer without also making the orange bluer (i.e. less orange) |

|
Migrant Mother
by Dorothea Lange Dorothea Lange, 1885-1965, recovered from a bout of childhood polio but was left with a weak leg and a limp. After studying photography, she moved to San Francisco and began as a commercial portrait photographer there. Her early work included images of Native Americans made during her travels to the Southwest. When studio work seemed limiting and static, she took her camera to the streets, to the breadlines, to the waterfront strikes, and to desperate people. She is best known for her work during the Great Depression, when she photographed the tragic suffering across the country for the Farm Security Administration, including the impoverished migrant farm families looking for work. During World War II, she documented the effects of the war on the factory workers, ethnic people and the Japanese-Americans in relocation camps. Her images were so critical of the Japanese-American policies that the Army impounded them during the war. Dorothea Lange's photographs humanized the tragic consequences of the Great Depression and were influential in the development of modern documentary photography. She is especially remembered for the photograph shown here, Migrant Mother, which became the symbol of the migrant experience. |

|
Georgia O'Keeffe by Alfred Stieglitz Alfred Stieglitz, 1864 –1946, spent his fifty-year career promoting photography as art form, comparable to painting and sculpture. With financial support from his family, he was able to dedicate his working life entirely to photography. The defining moment of his life was his marriage to the painter Georgia O’Keefe. He made over 300 images of his wife, which are often cited as his greatest work. Pictured is Georgia O'Keeffe. Alfred Stieglitz saw photography as a distinctive medium of individual expression. Many of his photographs are composed as if they were painting or sculpture. |
Bibliography.
websites.
http://www.olympus.co.jp/en/support/imsg/digicamera/download/manual/esystem/man_e520_e.pdf
http://www.olympusamerica.com/cpg_section/cpg_support_manuals.asp?id=1386
http://3.bp.blogspot.com/-f_V3m5H2kok/UO449oqIS6I/AAAAAAAABv4/WOPJWBKT8_s/s1600/ApertureAndShutterSpeedChart.jpg
http://www.olympusamerica.com/cpg_section/cpg_support_faqs.asp?id=1386
http://photodoto.com/photography-lighting-techniques/
https://www.pinterest.com/explore/abstract-photography/
Books.
The amateur photographer handbook. Published by Newnes Books.
What makes great photography. By Val Williams , Published by Frances Lincoln Ltd.
The manual of outdoor photography. By Michael Freeman. Macdonald futura publishers London.
